
Installation Instructions
Power Strip Mount for Rise Garden Gen 3
Required Tools
Philips head screw driver
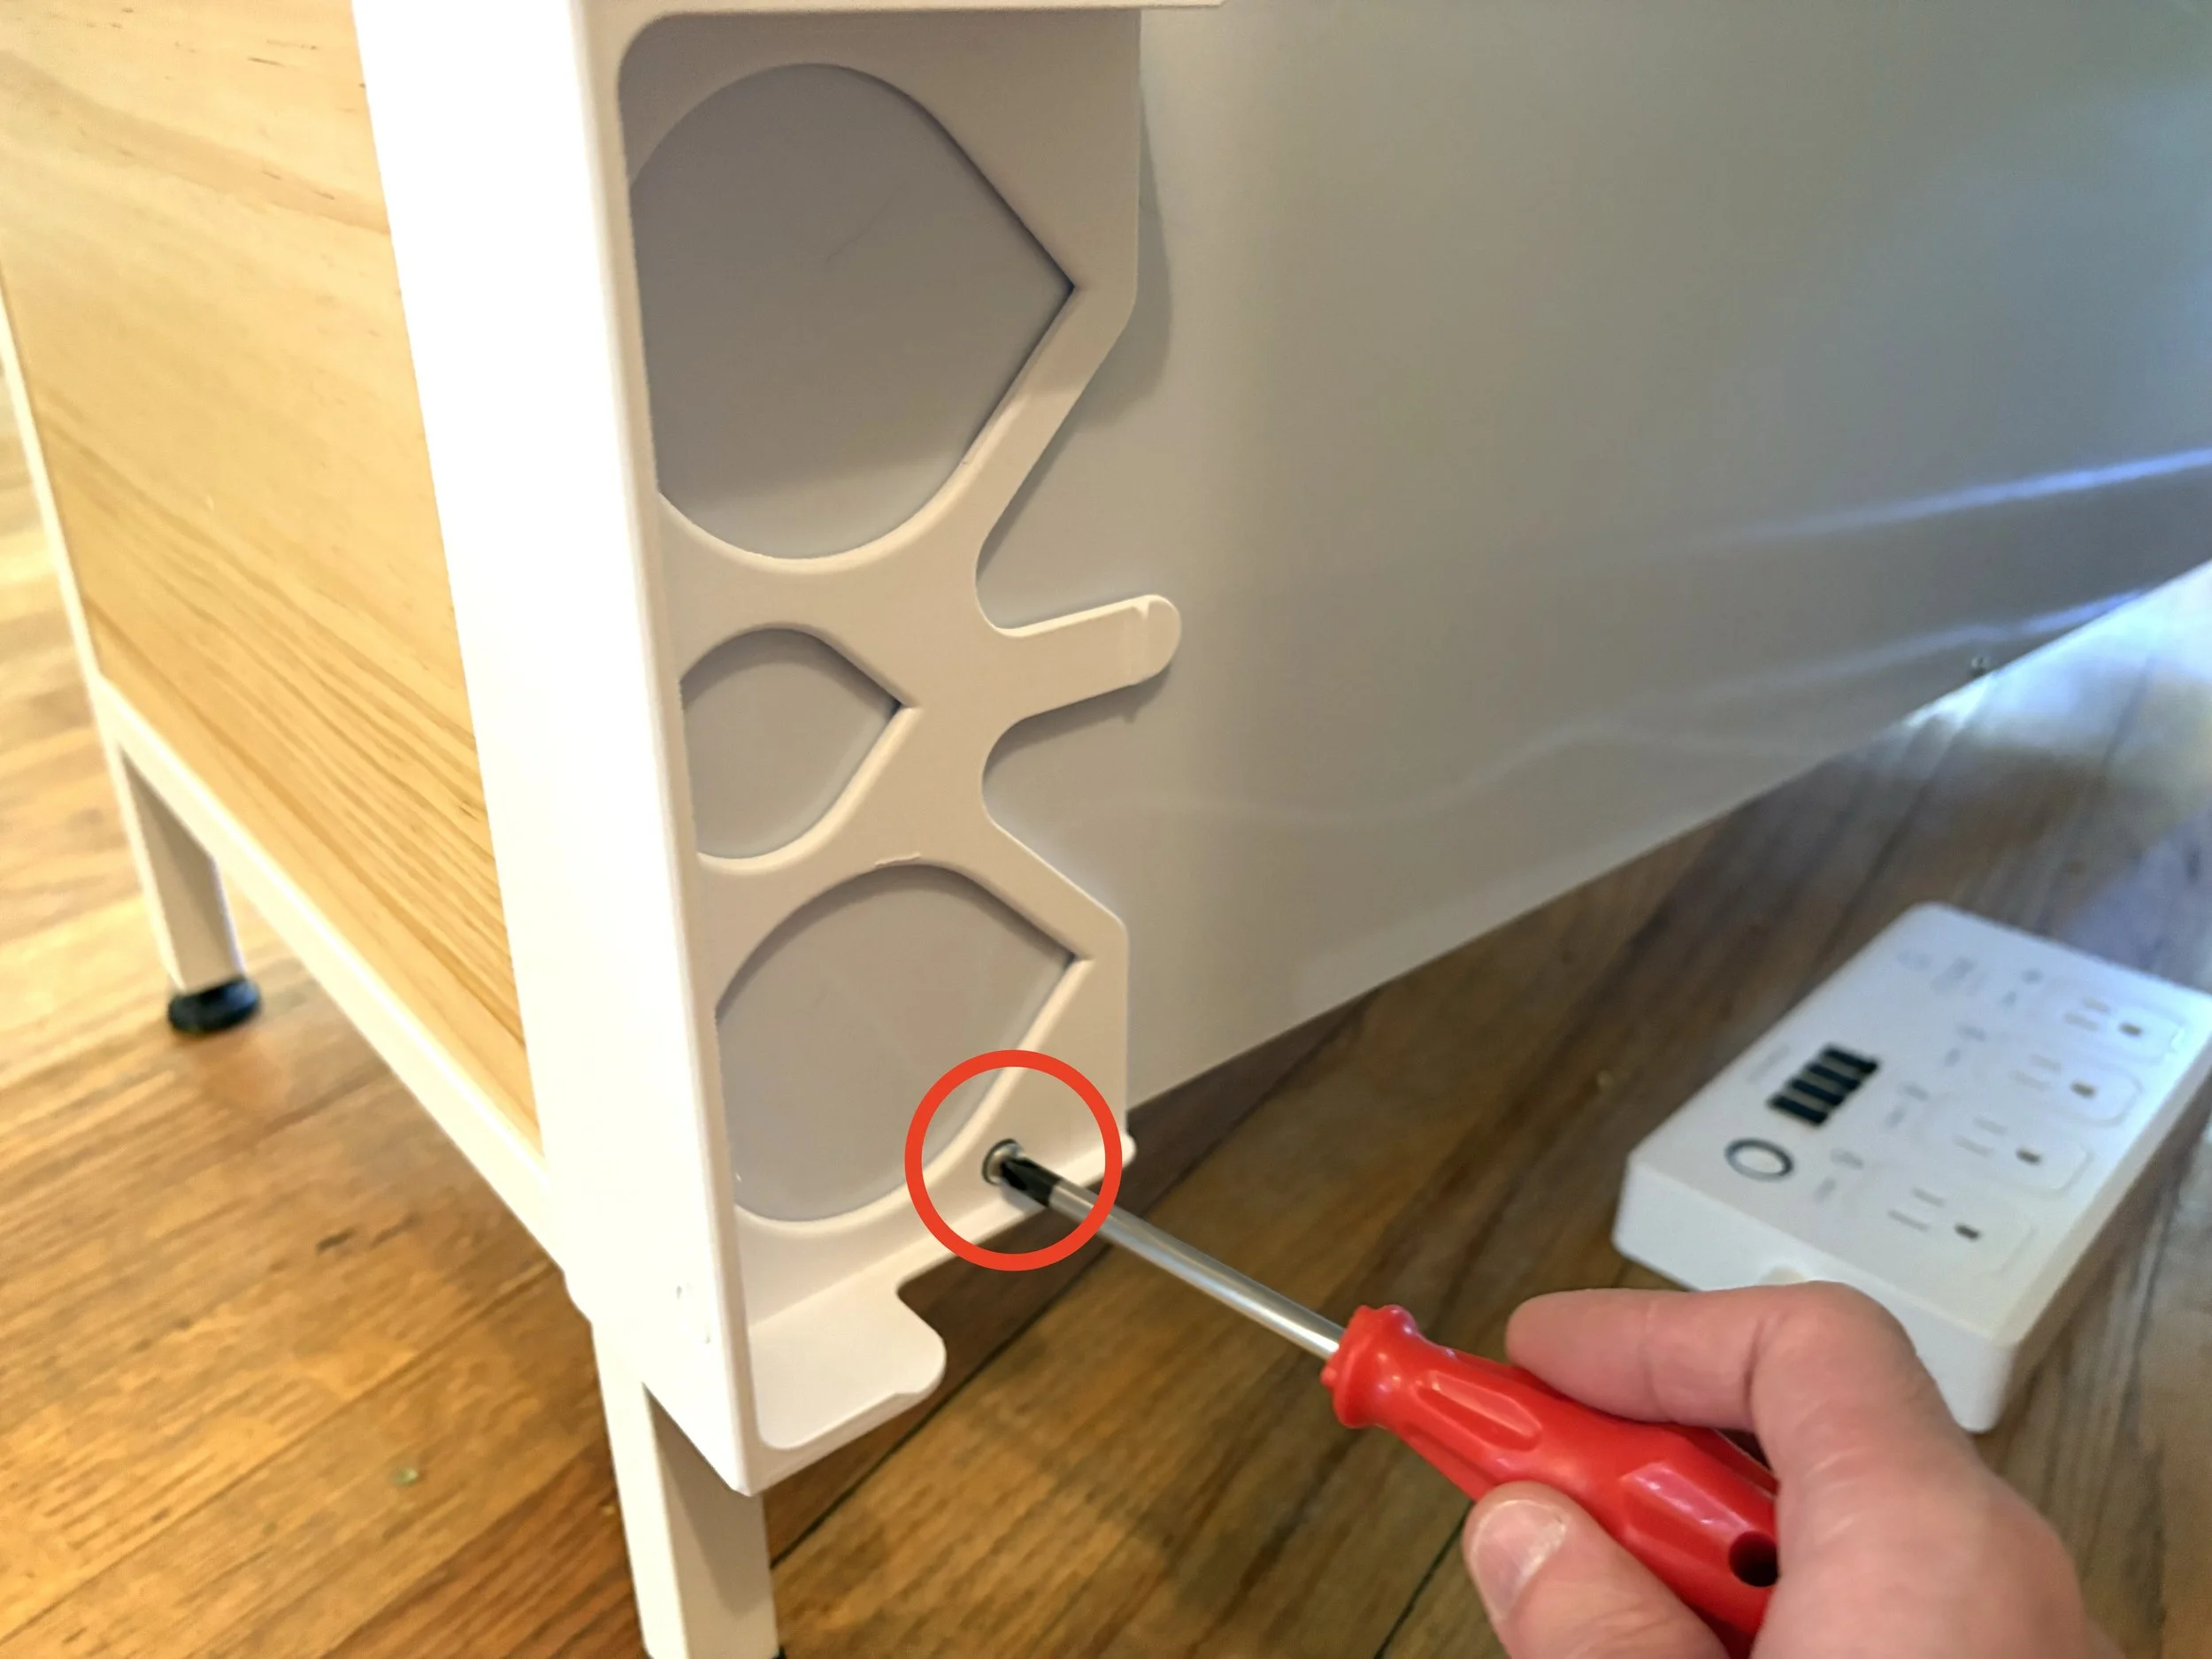
Step 1
Power off your garden and unplug all the cables from the power strip. Then make sure you have ample access to the back left of your garden when looking at it from the back. Use a Philips head screw driver to unscrew the screw at the bottom left when viewing from the back of the garden.

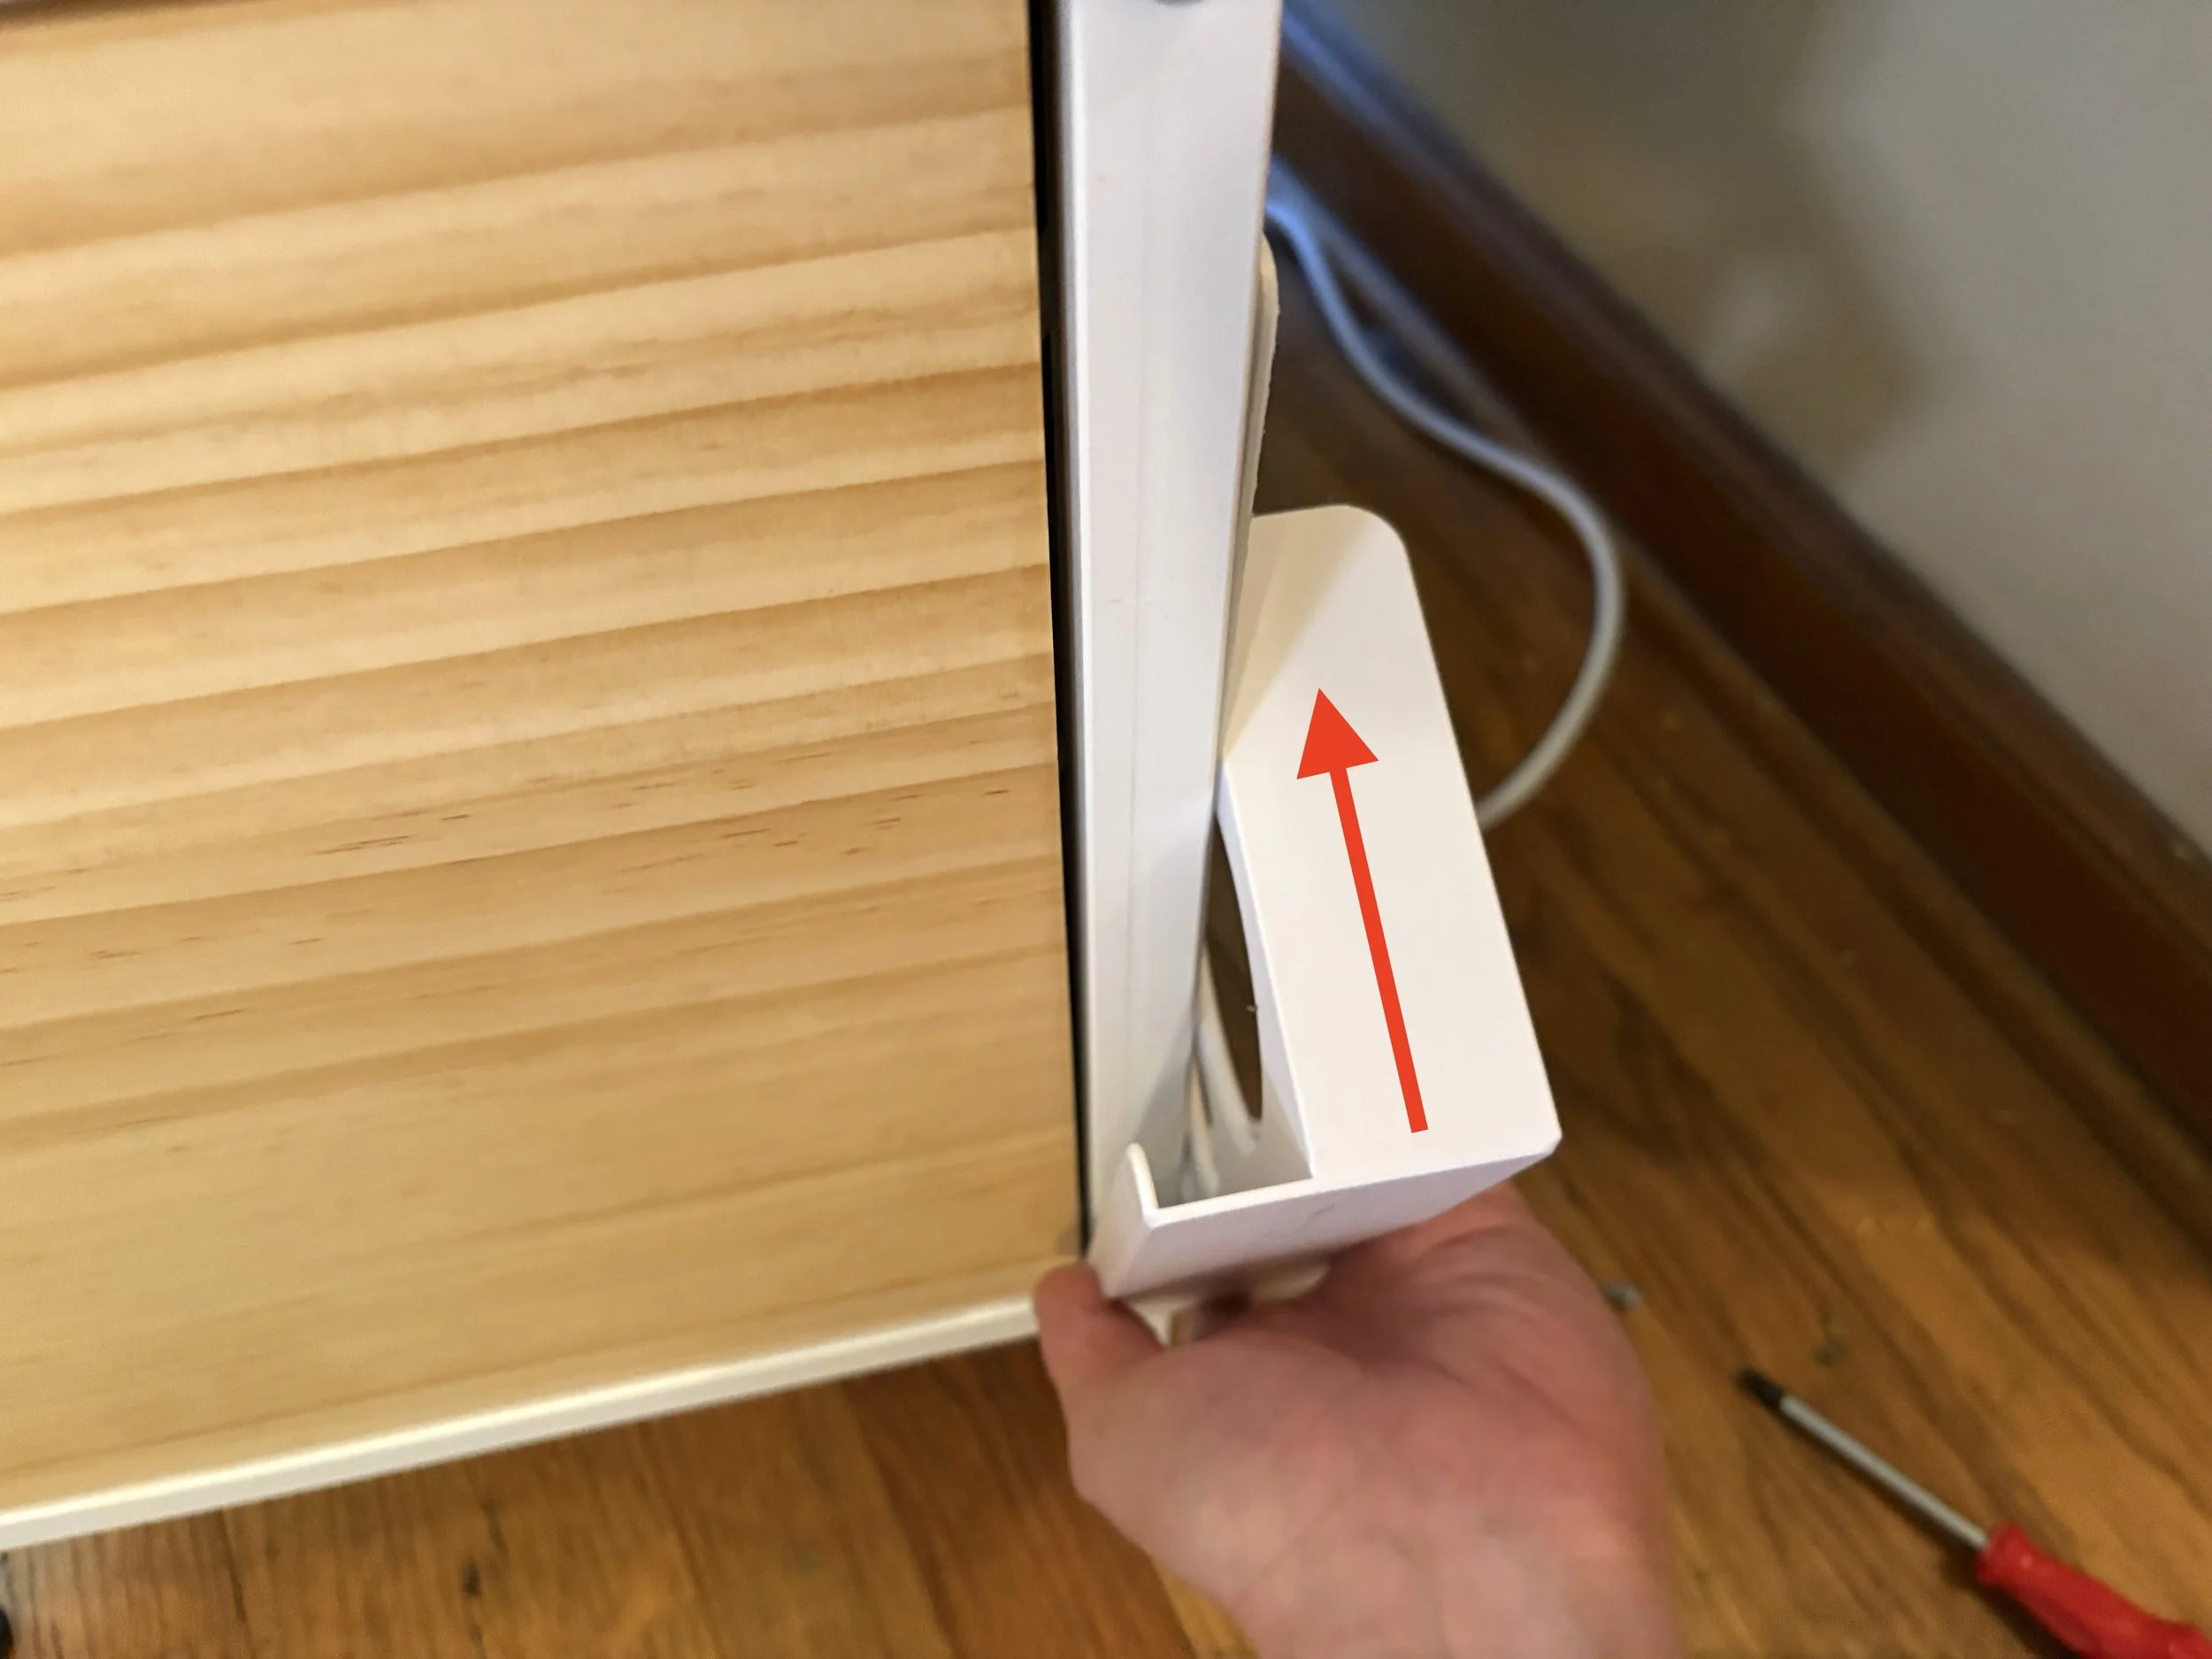
Step 2
Slide the Power Strip Mount into place. The thin tab on the left slides into the gap between the wood panel and the metal frame.
Use the screw you just removed to secure the Power Strip Mount to the base of your garden.
Step 3
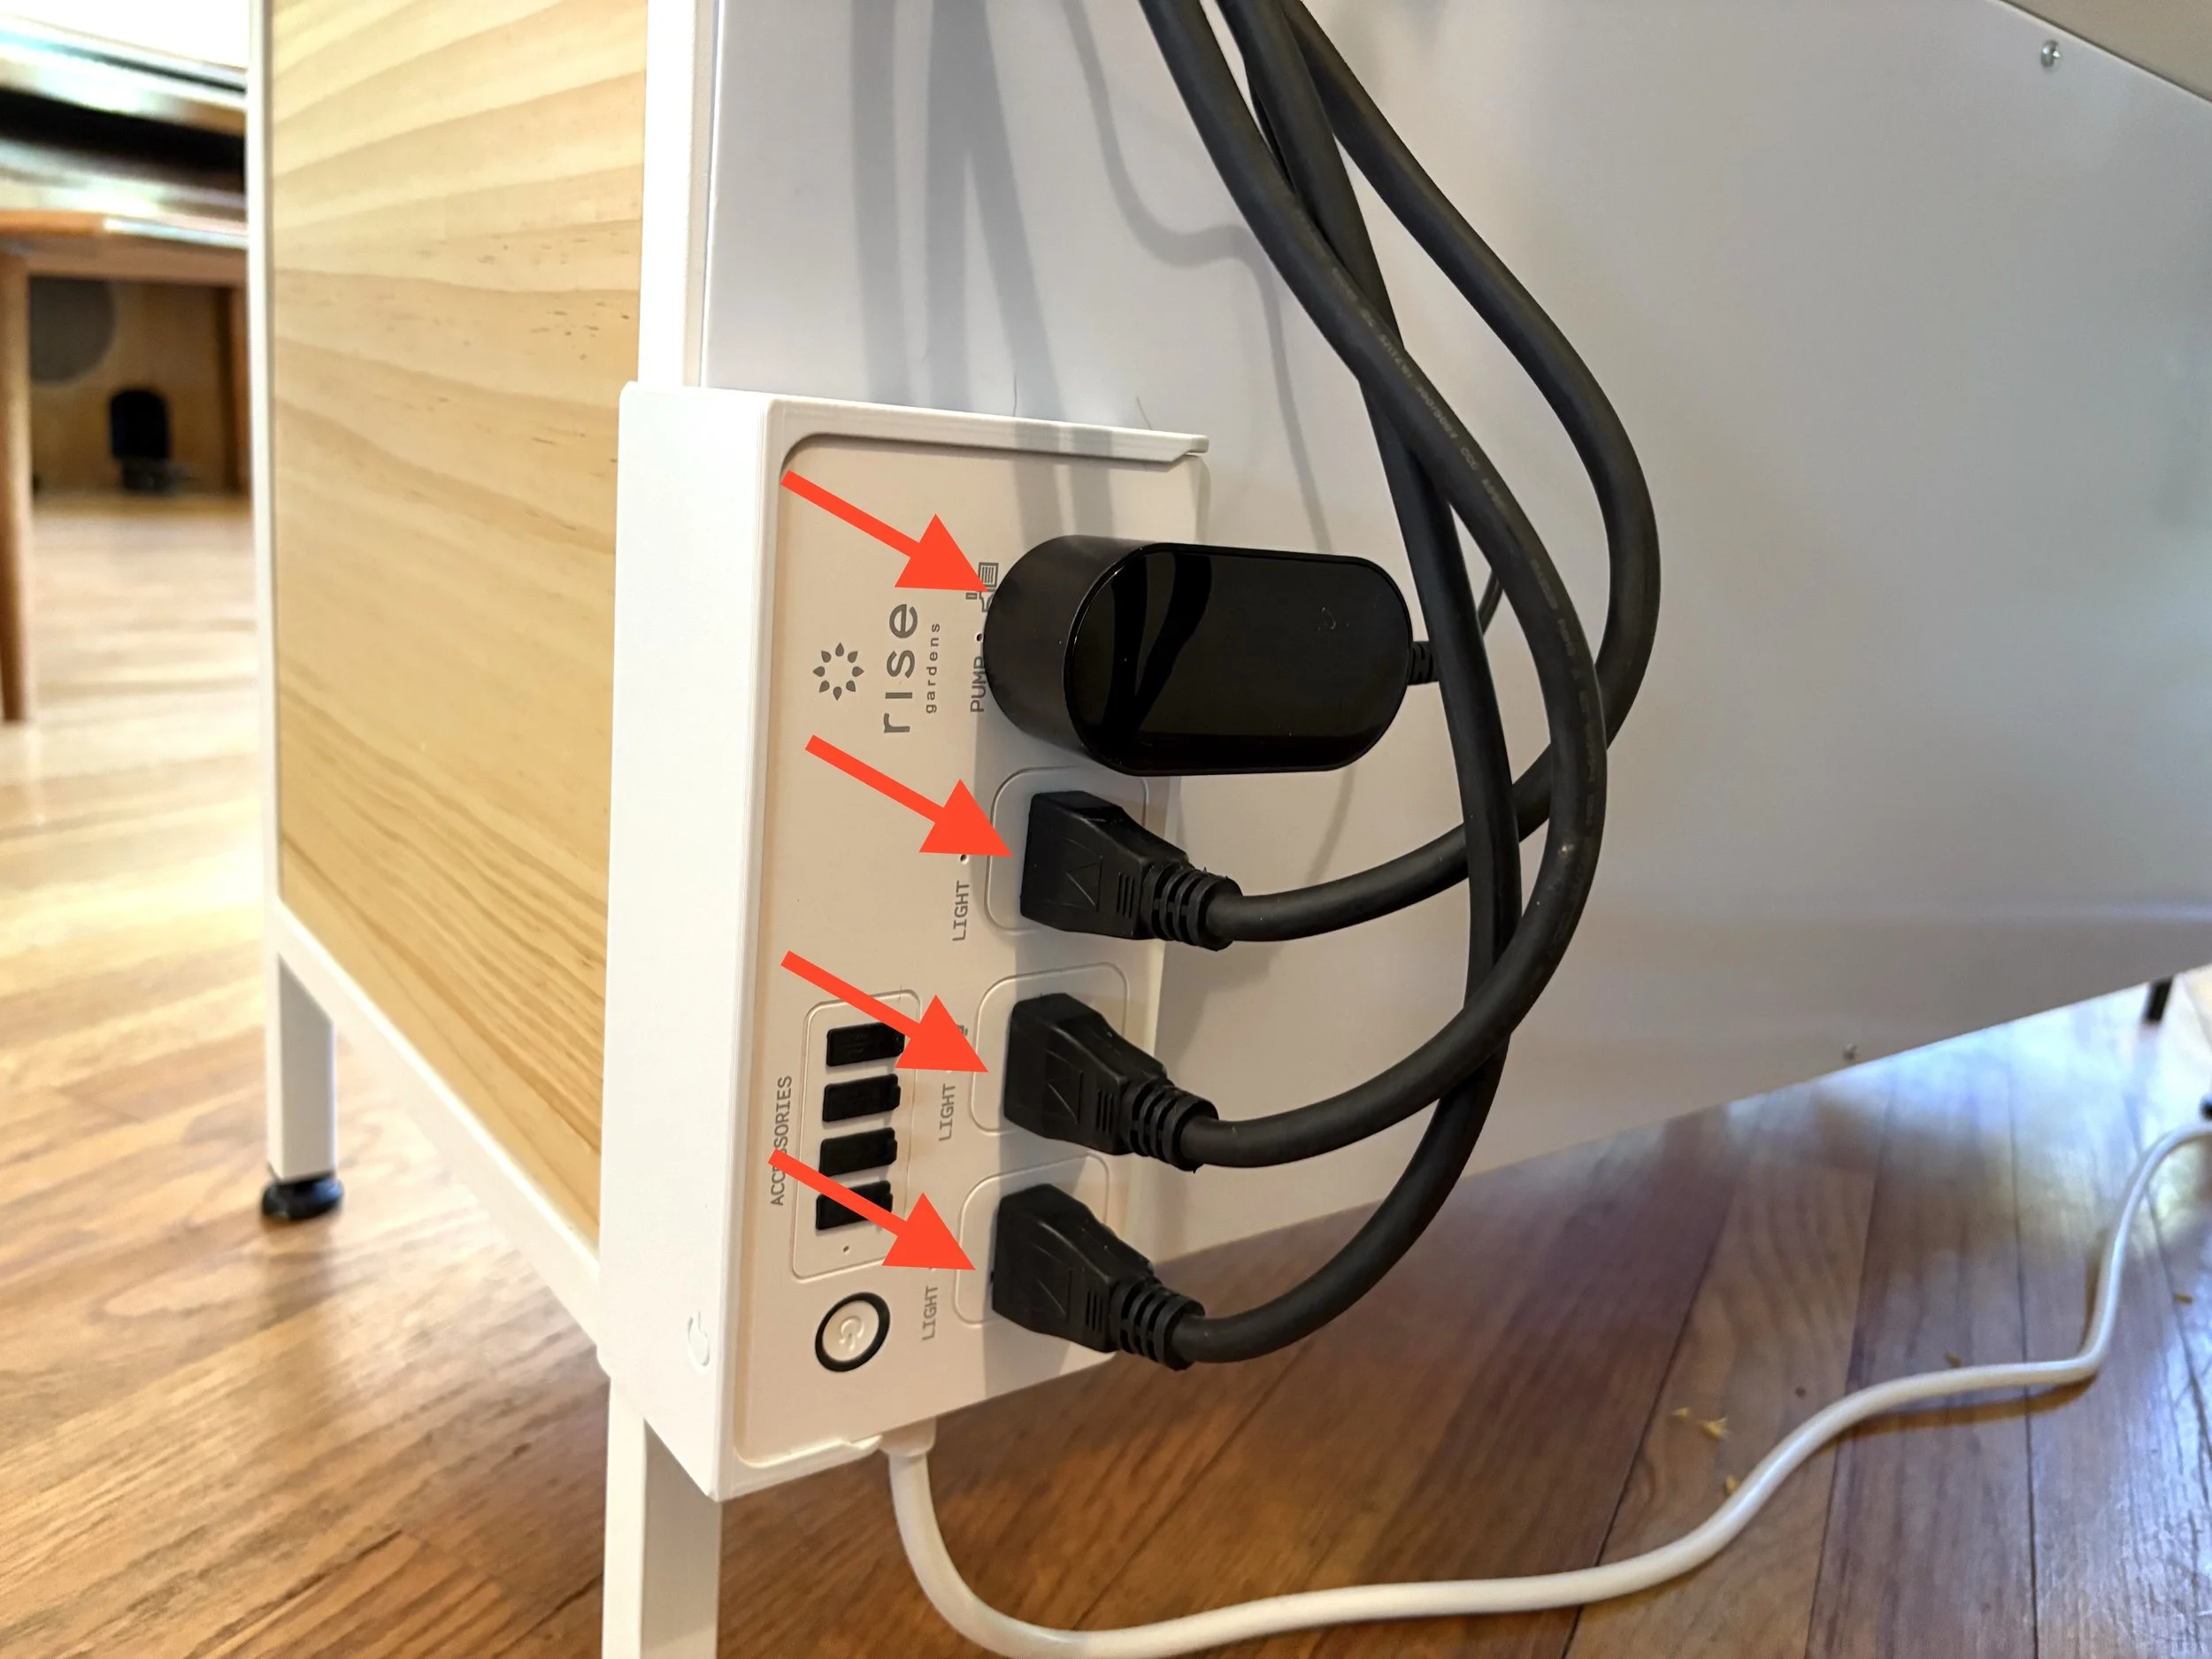
Feed the wires for the pump and the lights (up to 3 depending on how many levels your garden is) through either the top right cut out (Option 1), or the bottom right cutout (Option 2) . I personally prefer the top right cutout. You only need to feed enough of the wires though to reach the power strip just behind the cutout.
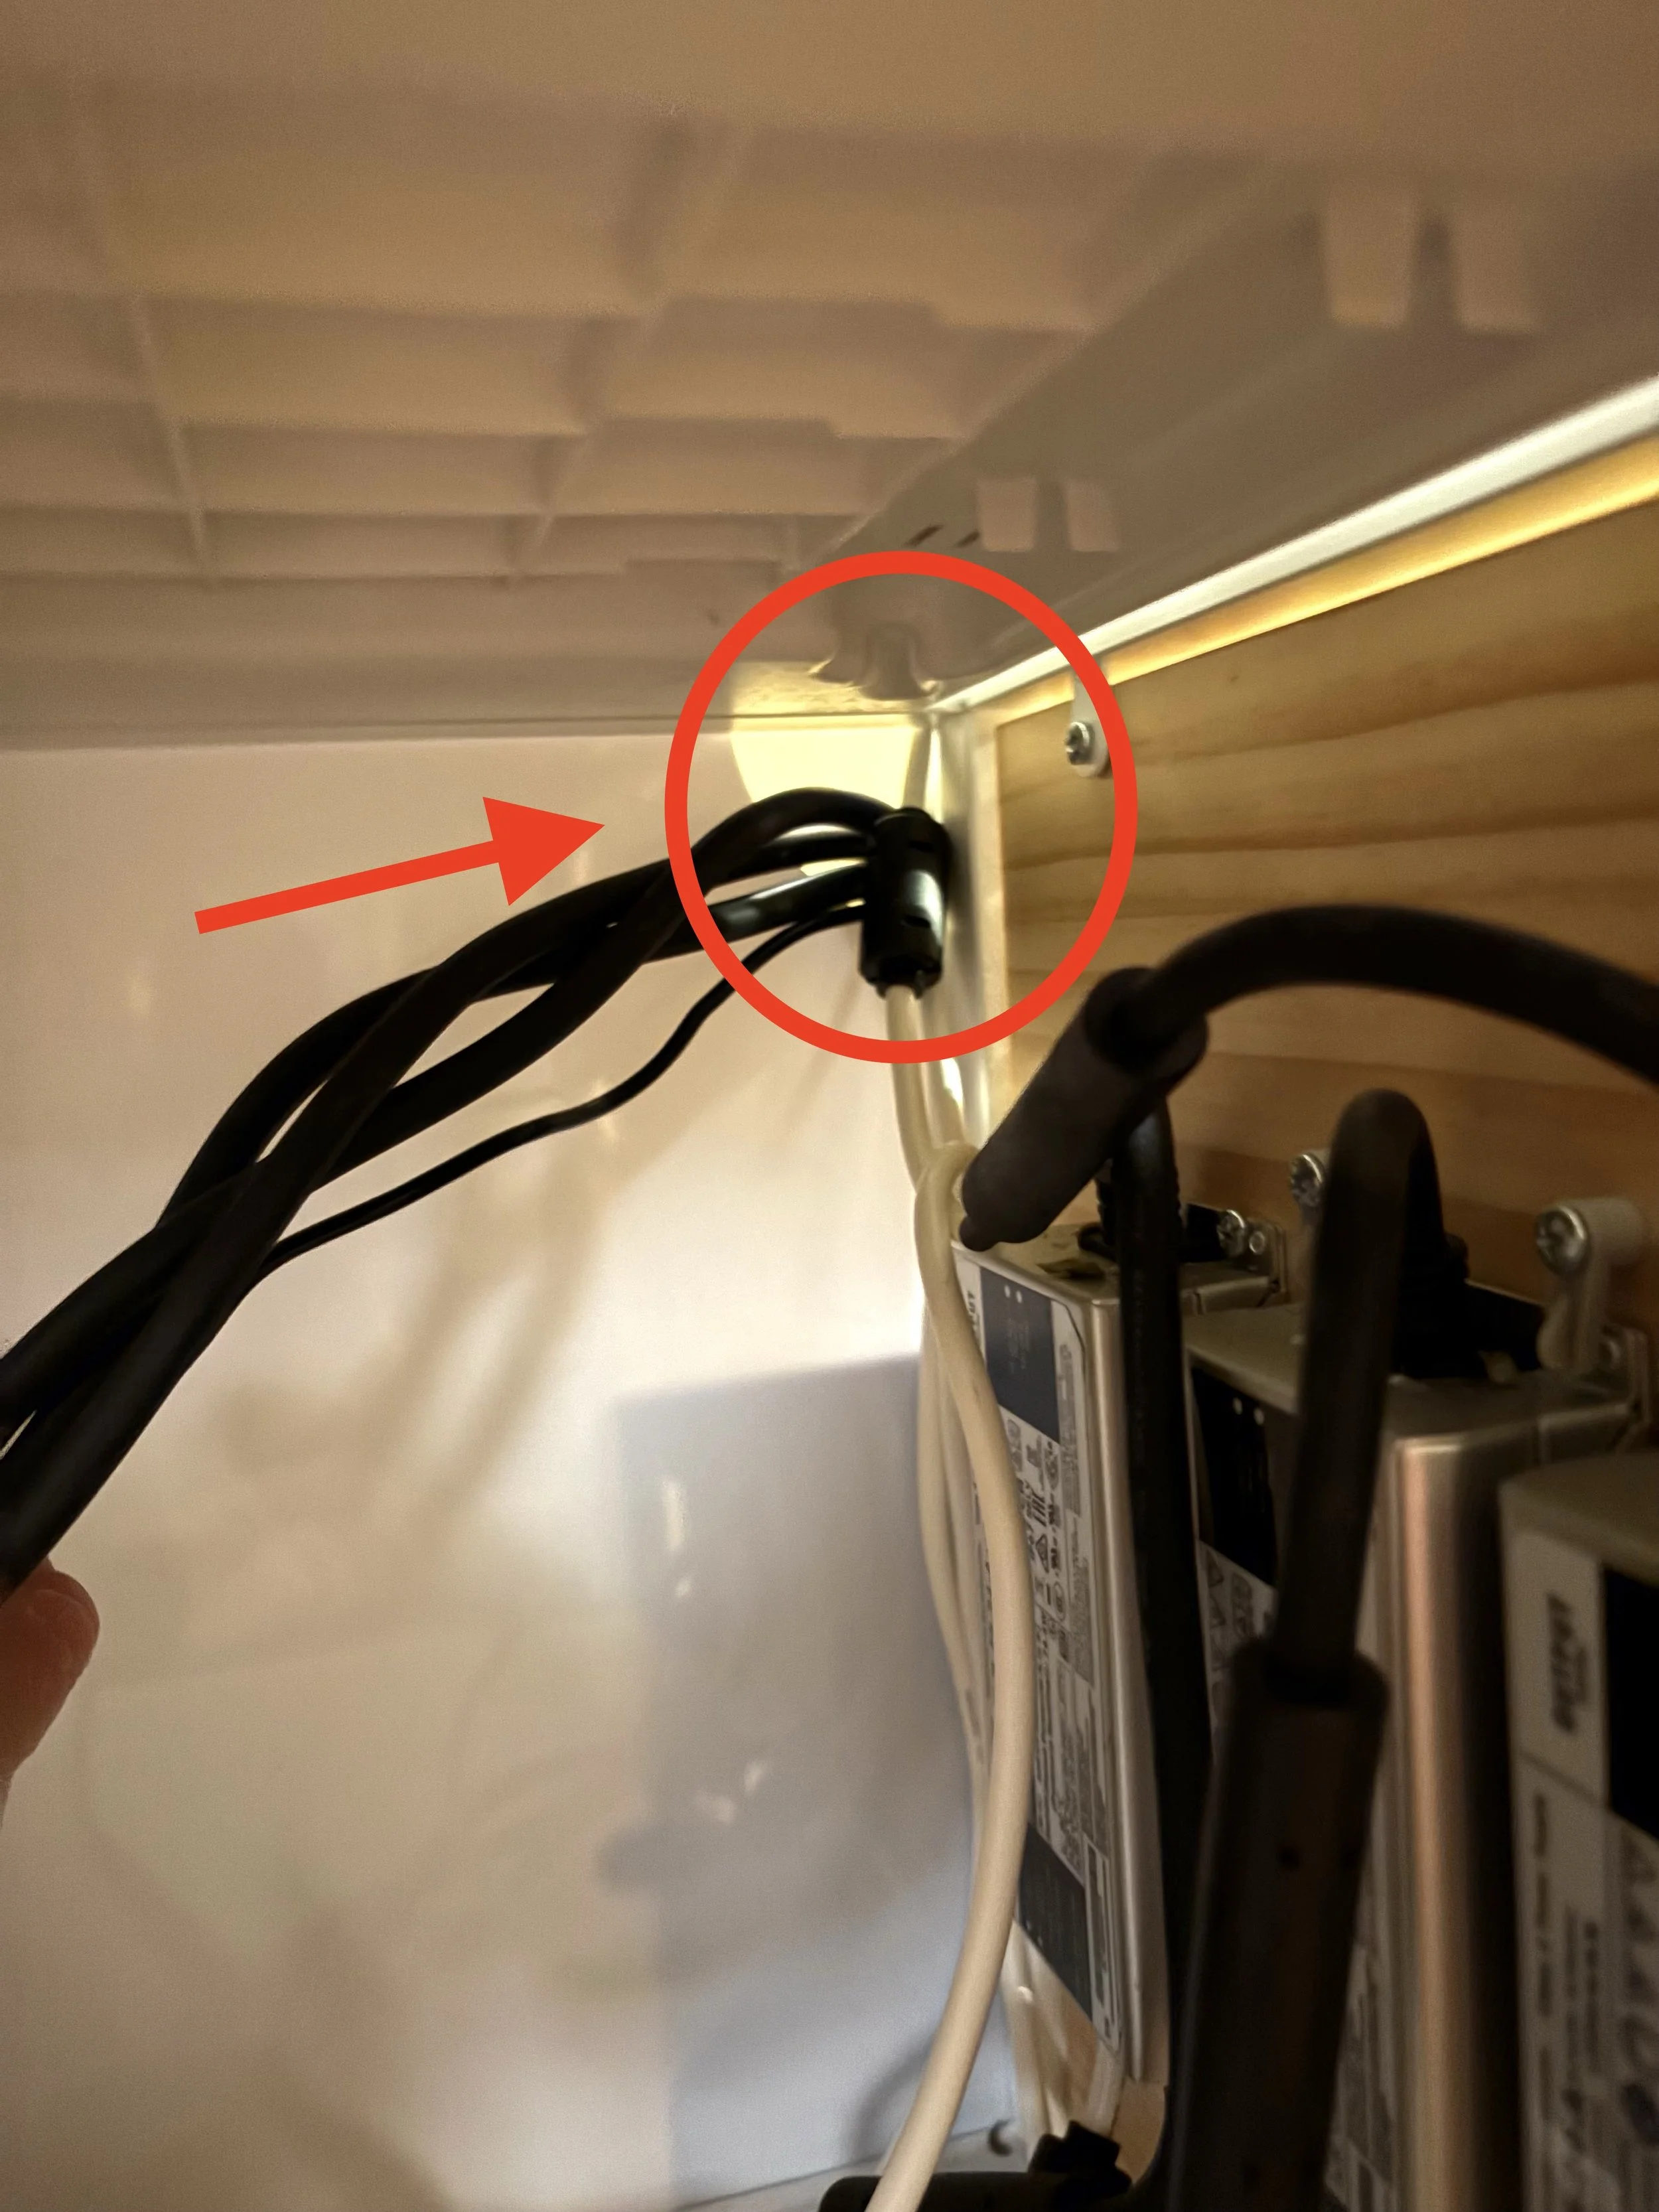
Option 1
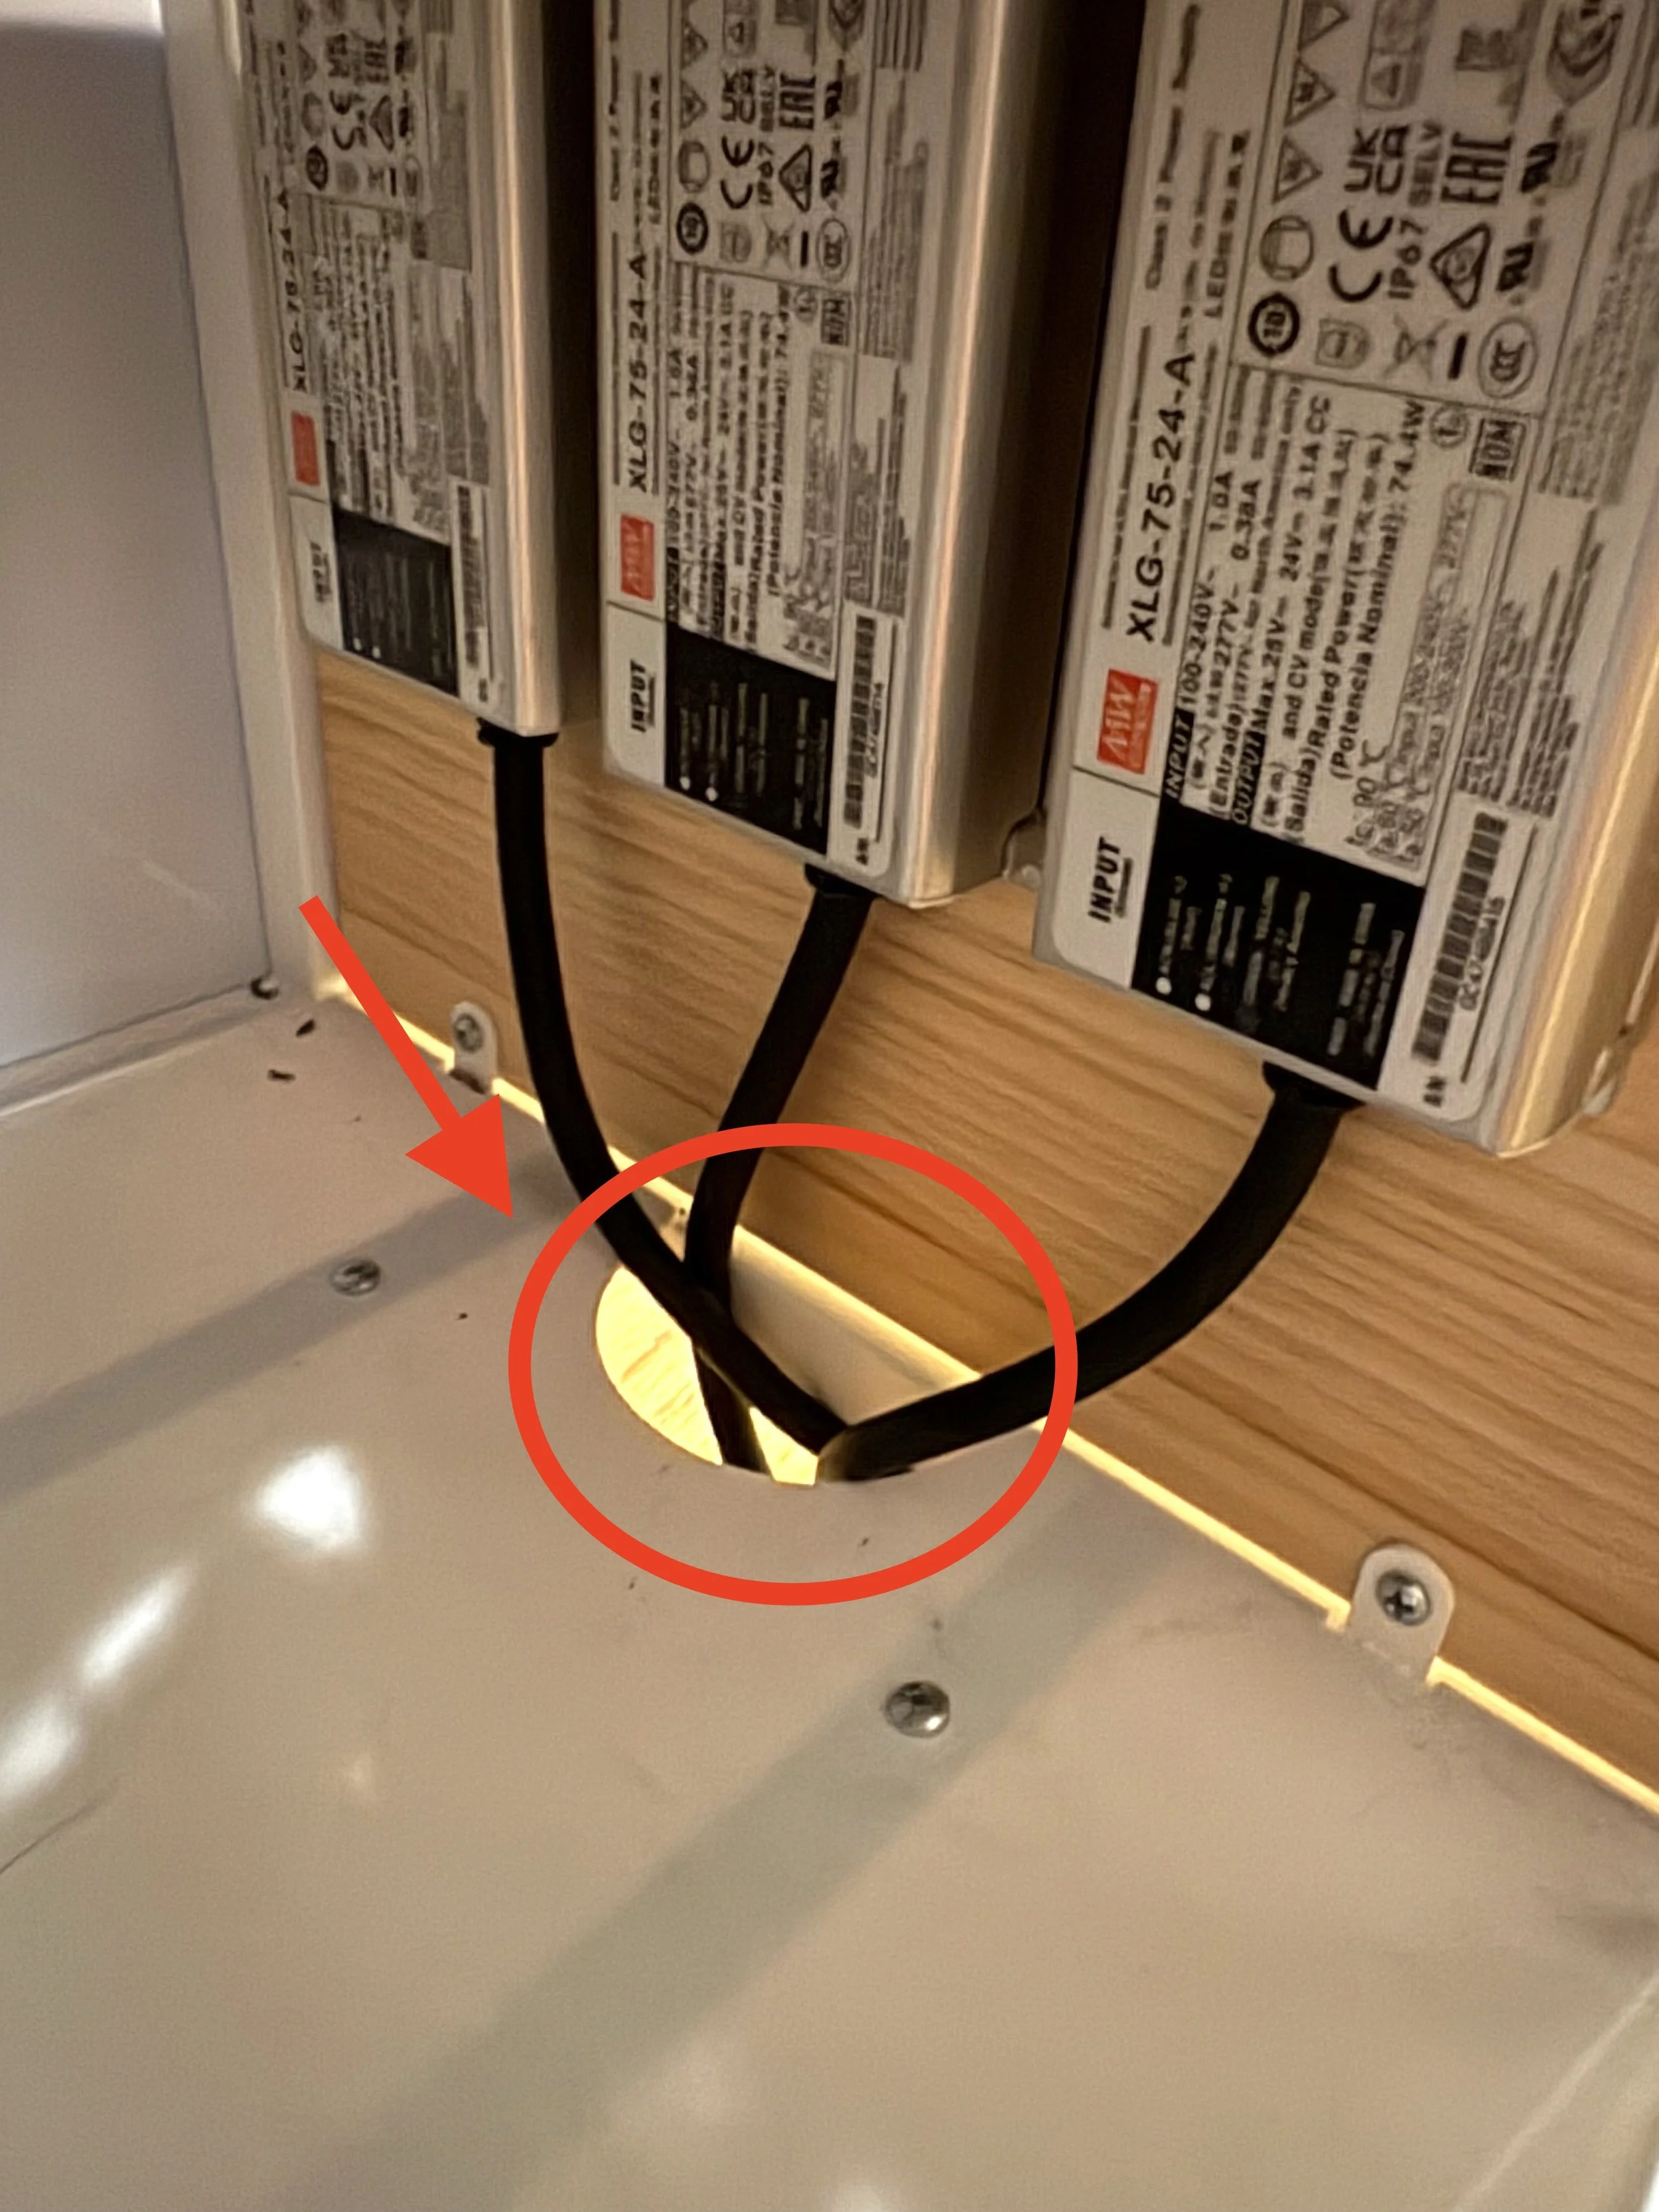
Option 2
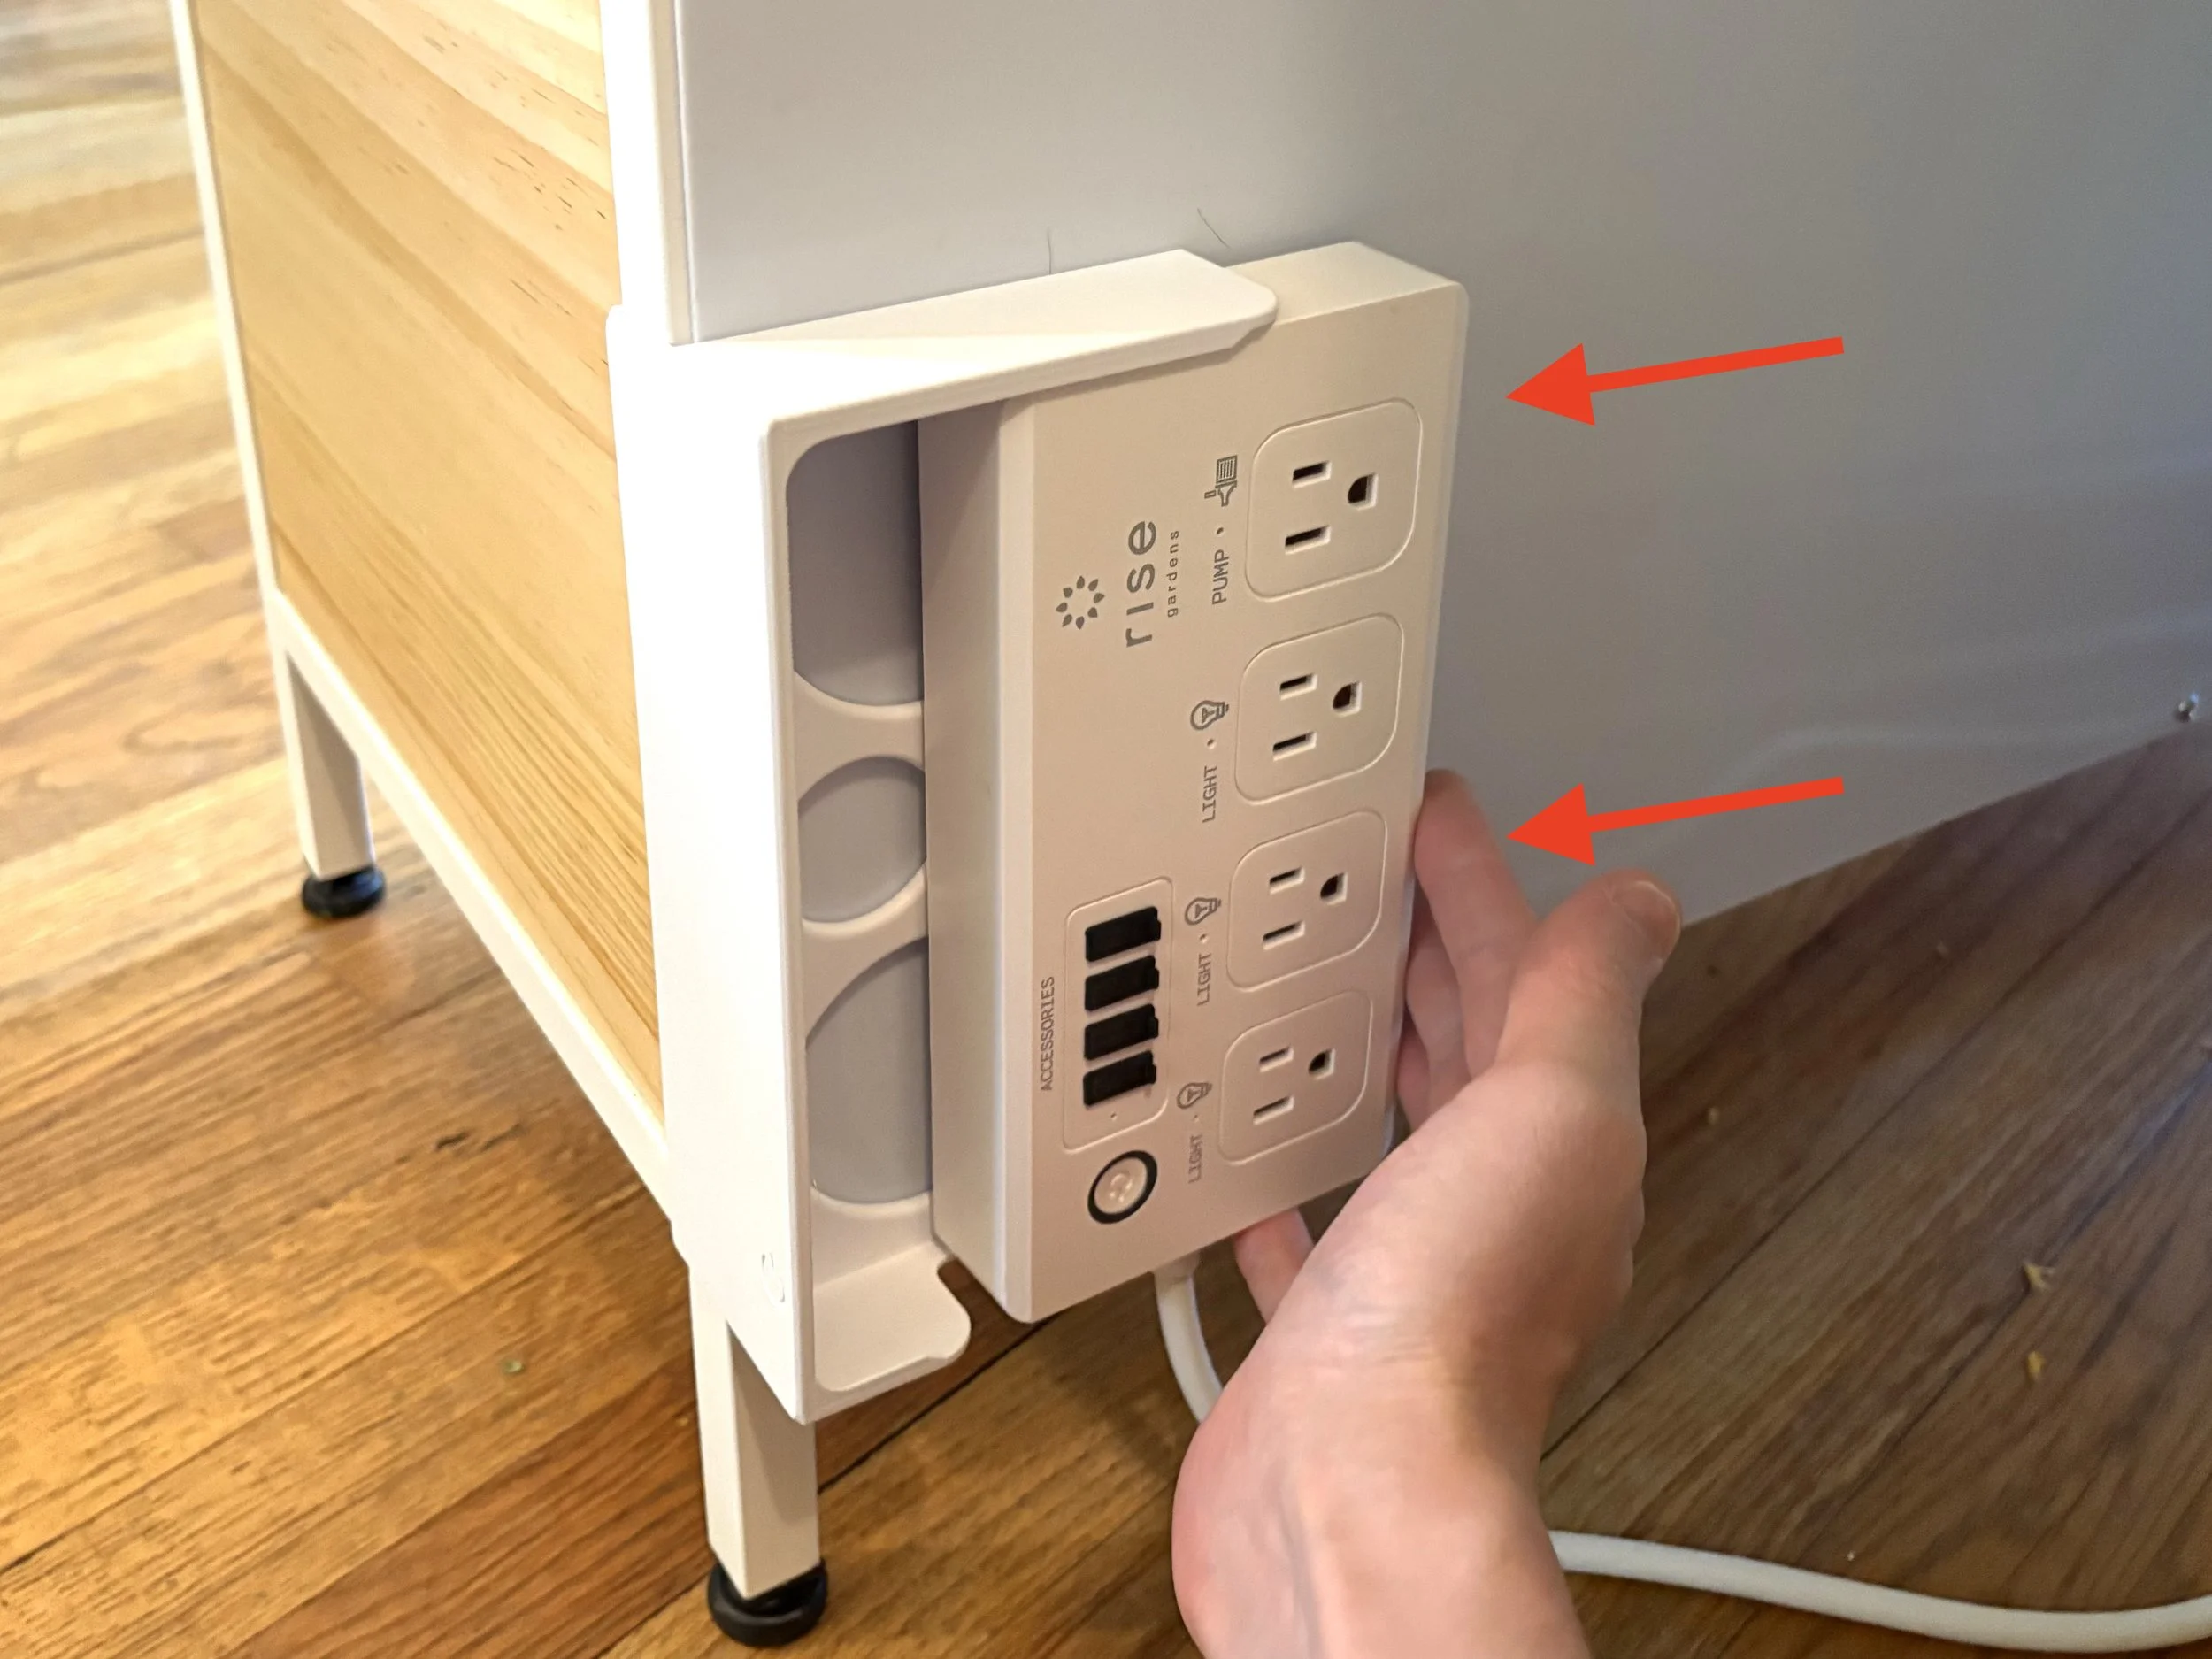
Step 4
Slide the power strip into the mount from the right until it snaps into place. Then plug in the pump and the lights. All done!
If you need to remove the power strip, push on the tab on the right and slide the power strip out to the right.
Close-up of a power strip attached to a wooden piece of furniture, with red arrows pointing to its electrical outlets.
The image shows a power strip with multiple black electrical cords plugged into it, mounted on a white appliance with a wooden surface beside it. The power strip has labels including 'RISÉ,' 'Glow,' 'Diffuse,' and 'PUMPKIN,' with a sun icon indicating lighting controls. There are red arrows pointing to the labels and black cords.
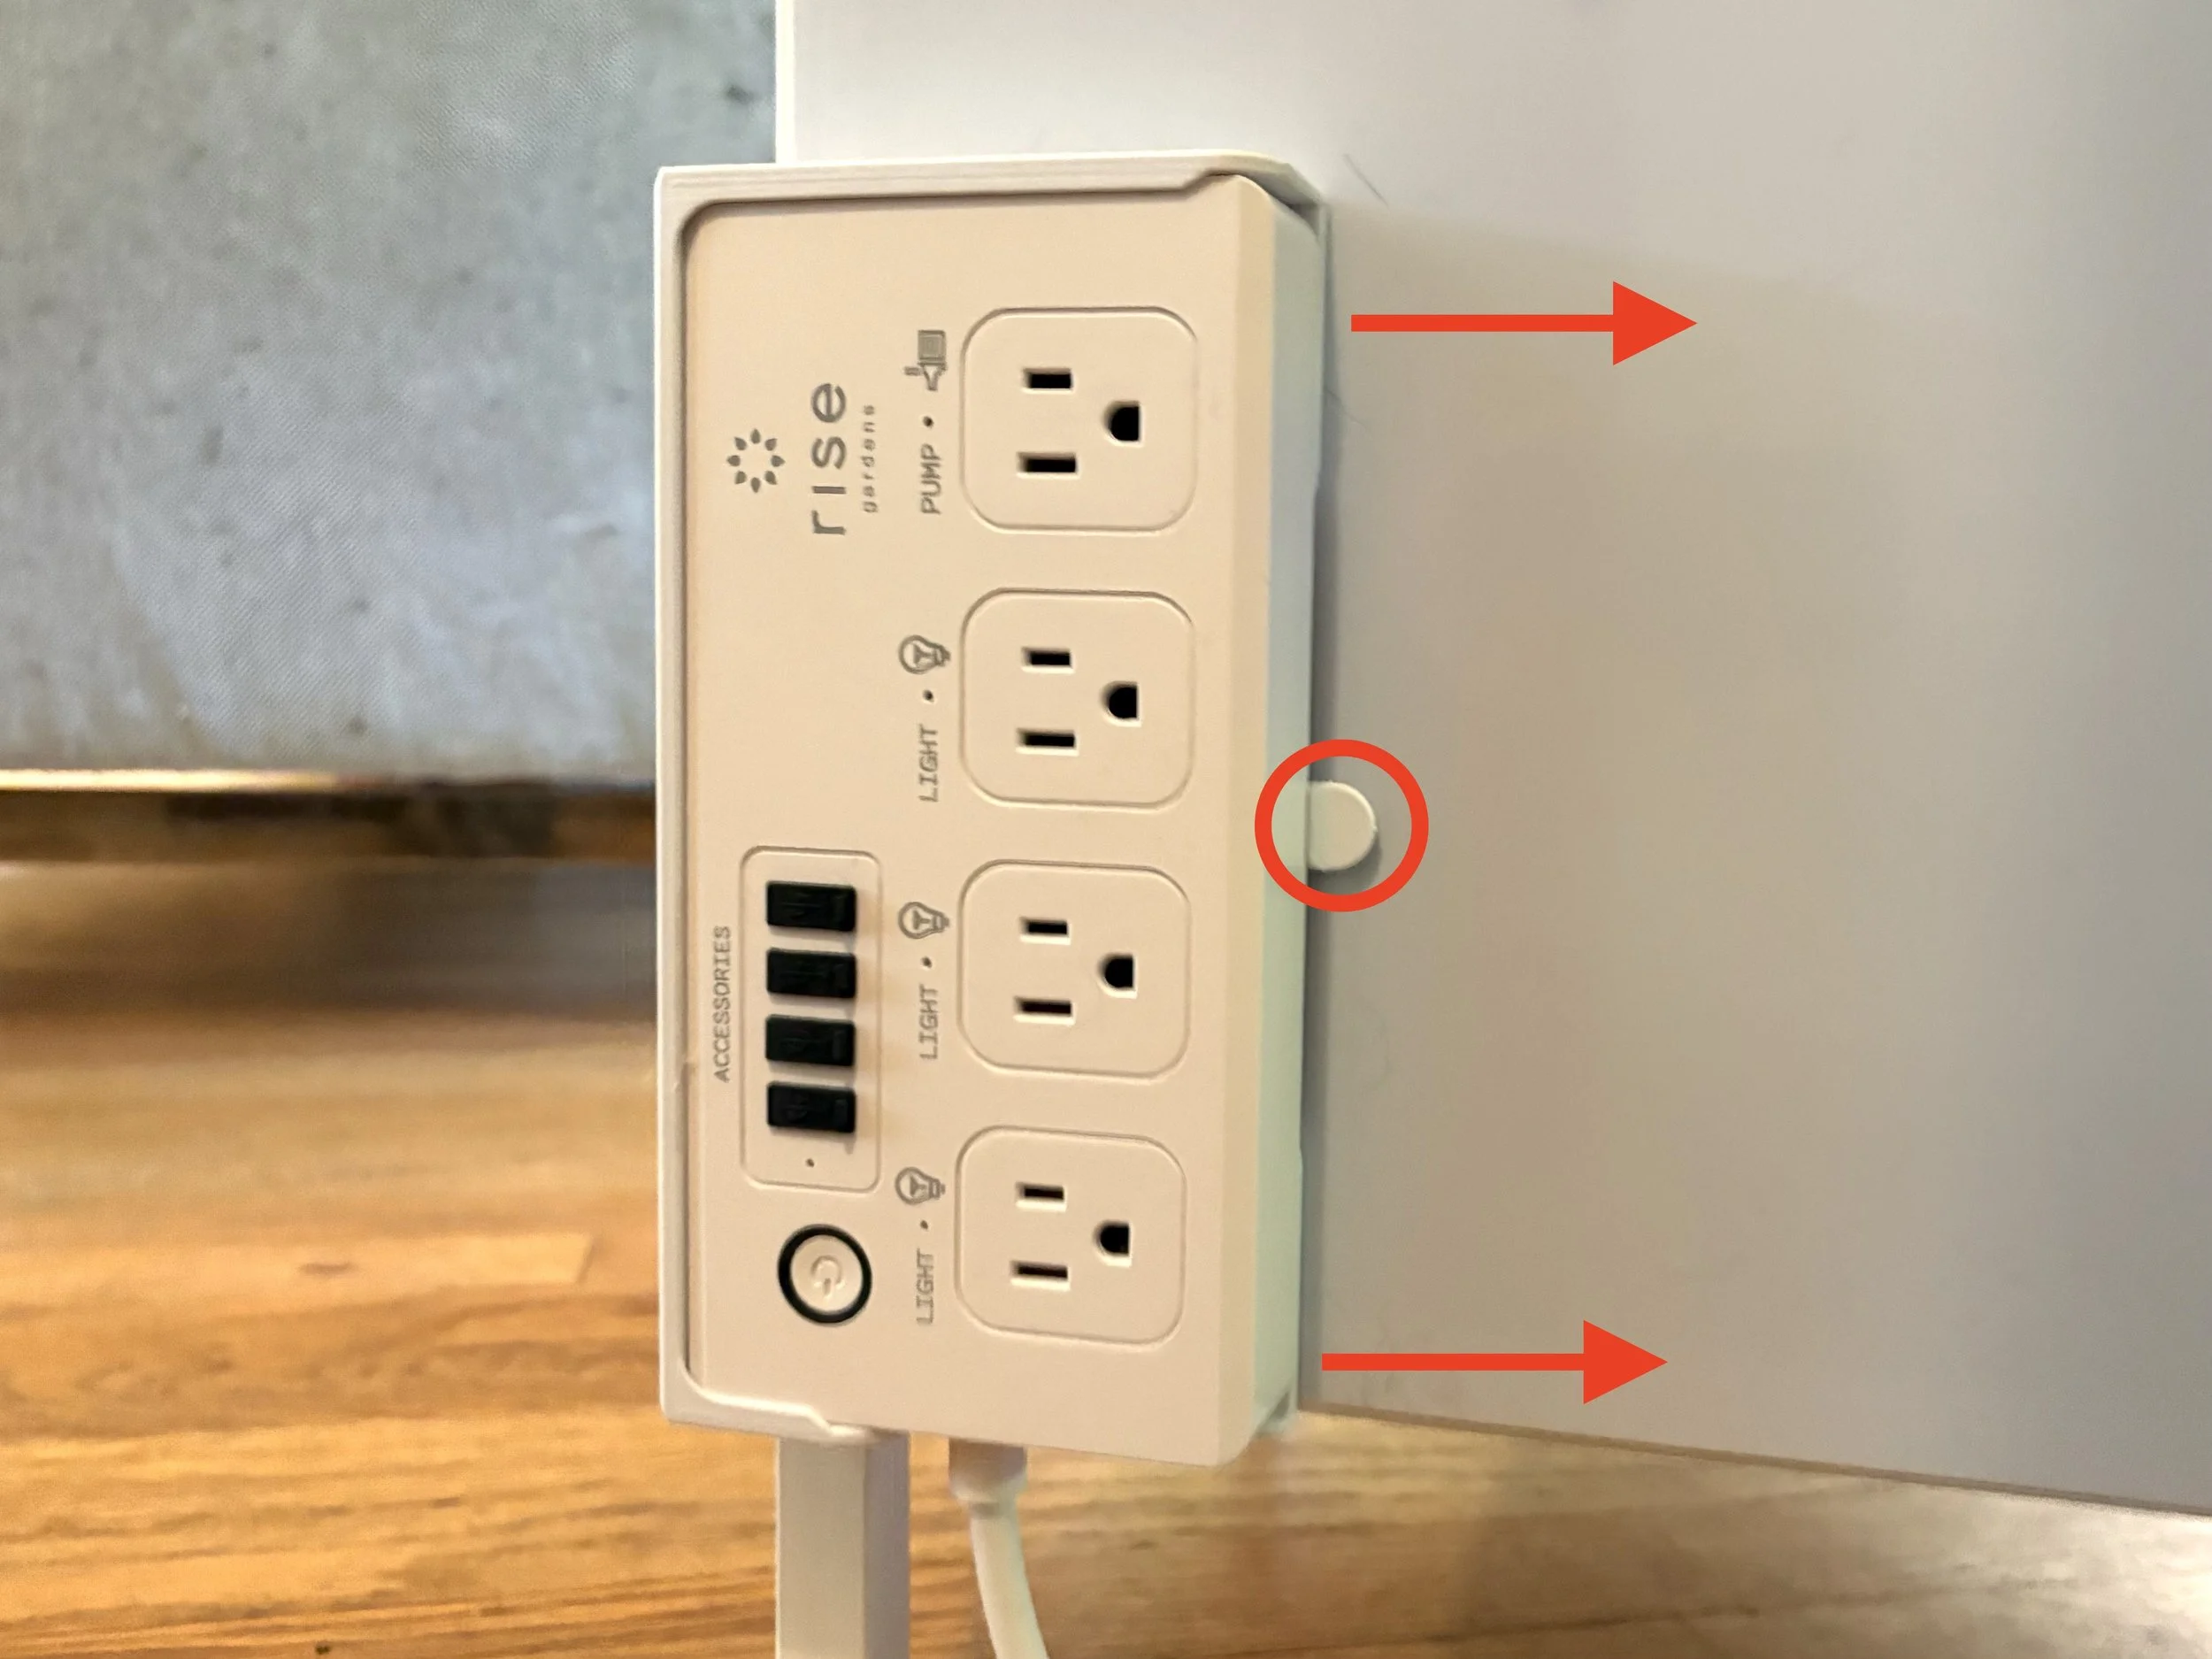
For removal